There are many thousands of satellites orbiting the earth all the time, and some are visible with the naked eye on a clear night with lower light pollution. Previously the brightest transit of a man-made structure in the night sky was the International Space Station (ISS), but now private space exploration company SpaceX (founded by Elon Musk) has launched several satellites into low earth orbit in an attempt to provide internet connectivity to the entire globe. This is great for those with limited or no access to internet services, but for photographers and astronomers alike, the satellites are standing out.

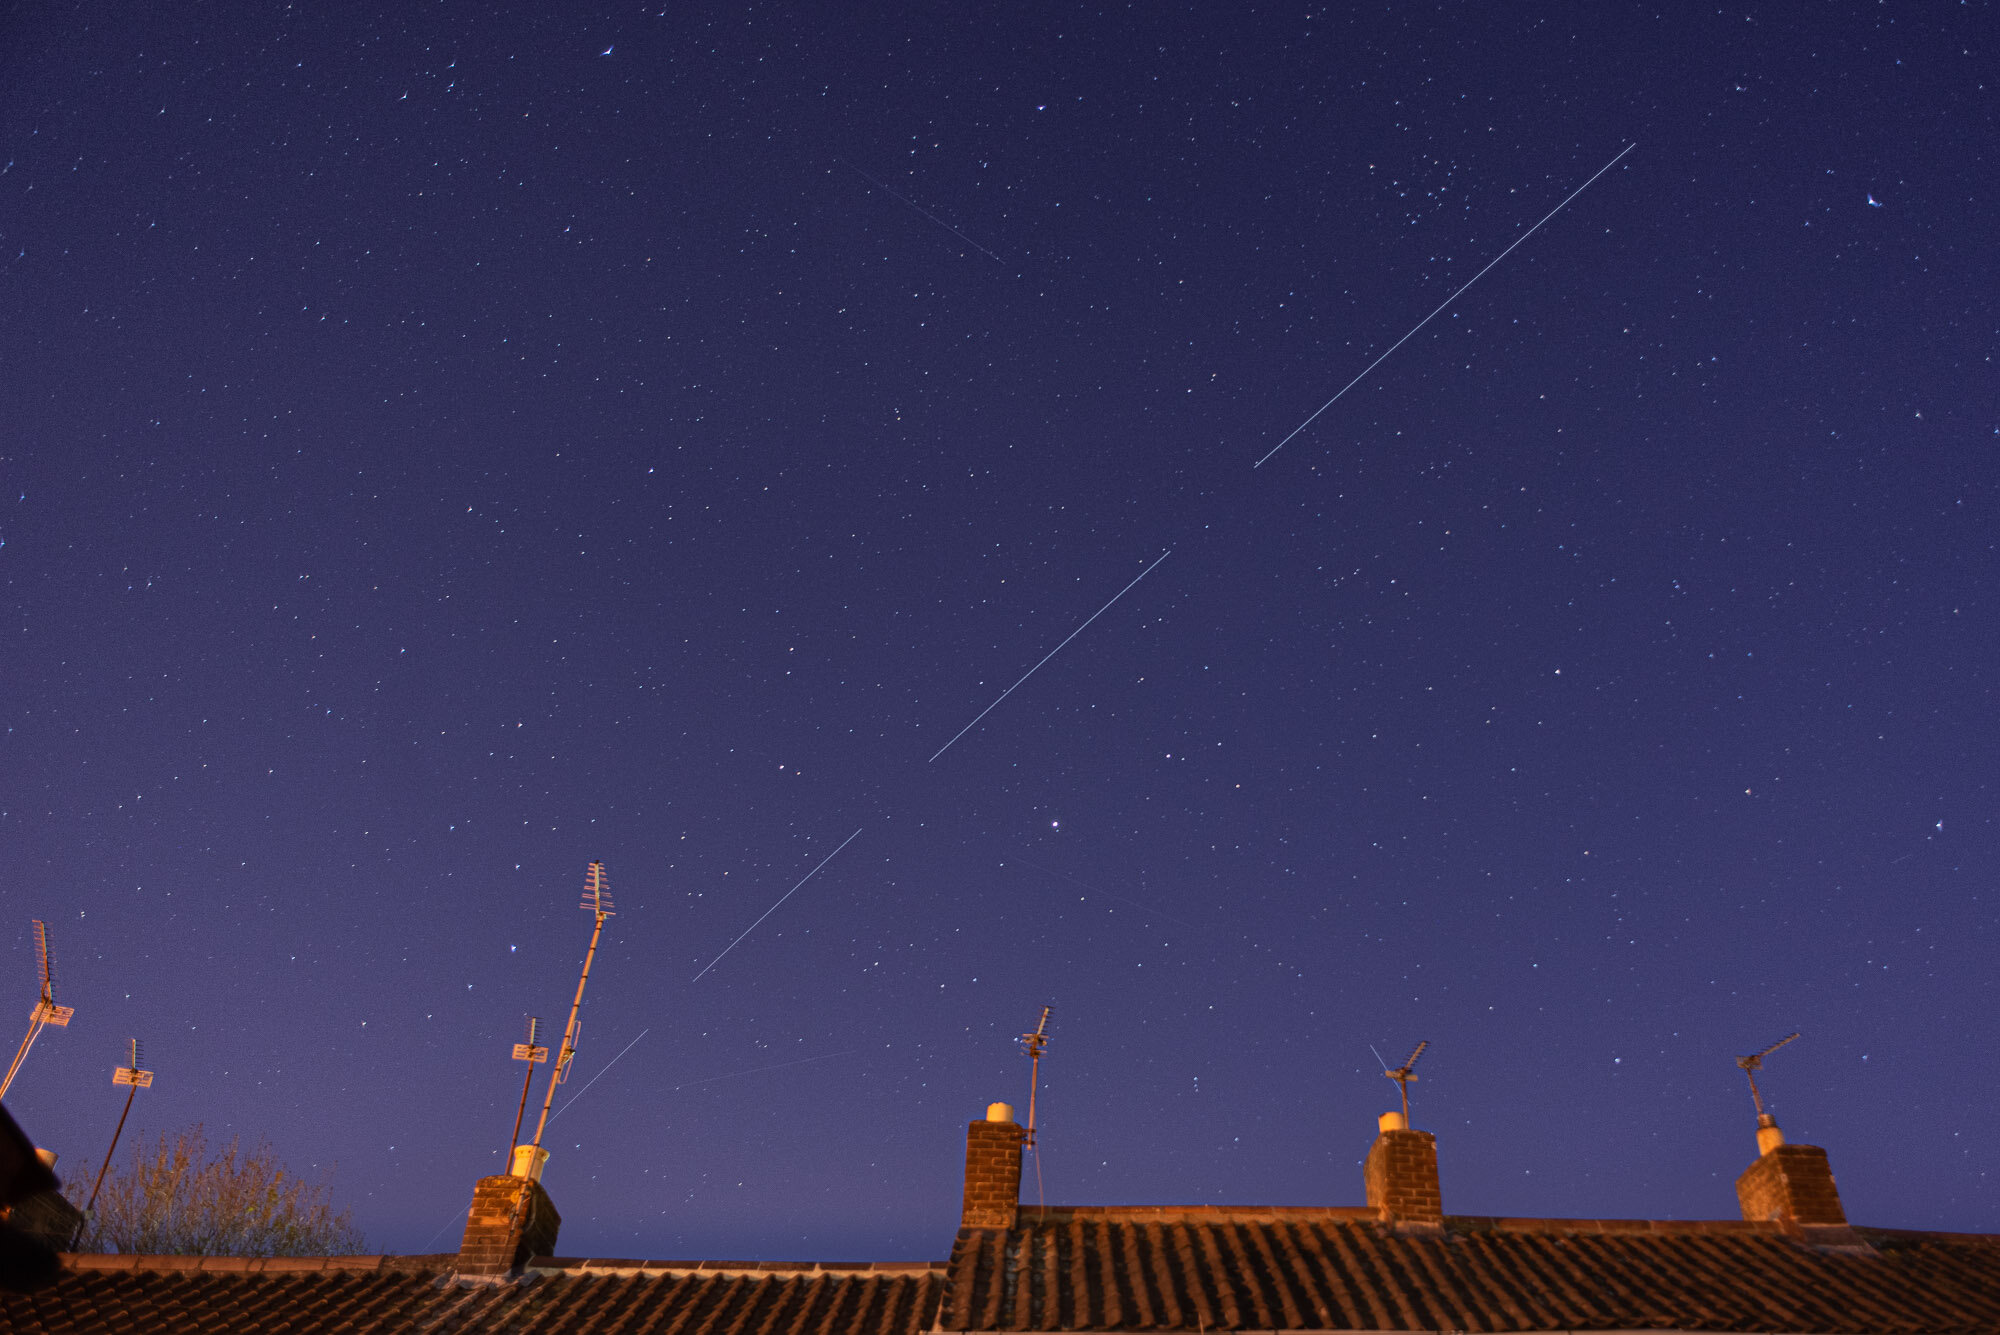
Starlink Satellites are numerous, and even brighter than other satellites that currently shoot through the night sky
Although some dub the Starlink satellites as an eyesore, and there are even reports from major observatories pointing to degradation in scientific data recording, they can look pretty cool in a photograph. In fact, in direct response to mounting pressure from observatories and scientists worldwide, Elon Musk recently stated that the satellites would be adjusted to reduce their impact on the night sky. So you may only have a brief window to capture the satellites in all their bright-shining glory, before they’re dulled. If you want to find out how to spot and photograph them, then follow my steps below.
Camera Kit You’ll Need
The essential items are:
Camera capable of manual mode and self-timer or exposure delay mode
Wide angle lens
Tripod
Desirable items that will help would be:
External remote shutter release (wired or wireless)
Viewfinder cap
Bungee cord
Camera bag/some kind of weight
Spare, charged batteries
Compass or night sky app on a smart device
Hat, gloves, thick socks and other warm clothes
Finding the Satellites
Here in the UK we’re most likely to see the Starlink satellites appear from South West heading towards East. But to check their appearance where you are use Findstarlink.com for an accurate timing over your local area.

Findstarlink.com is a simple to use, location-based website that shows you when and where the Starlink satellites will appear in your local area
The best way to locate yourself is to use the stars themselves. First, locate the north star Polaris. Look for the constellation Ursa Major (aka ‘the great bear’ or ‘the big dipper’) which looks a bit like a saucepan. Then head to the end of Ursa Major and follow Merak and Dubhe, drawing a line up to the next brightest star. You’ve found Polaris. Facing North towards Polaris you’ll have South behind you, East to your right, and West to your left. Failing that, you could either use a compass or a night sky app on your smartphone or tablet (just be sure that your smart device compass is calibrated properly).

Look for Ursa Major and follow the two end stars, Merak and Dubhe, to find the bright north star Polaris
Check the weather forecast and head out when the skies are clear of cloud. But bear in mind that forecasts are just predictions, and if you’re shooting close to home, it may be worth heading out anyway to see if there’s a temporary change in cloud cover.

The Met Office produces some of the best weather forecasts in the world and covers temperature, humidity, cloud cover, wind speed and direction and much more
If you’re able to travel away from towns and cities then this will reduce the likelihood that light pollution will impact your astronomical photographs. You can look up light pollution levels for your area at Darksitefinder.

Darksitefinder.com is a good resource to discover dark sites in your local area, so that you can avoid the worst light polluted skies
Using the Best Settings
You can shoot the satellites using a combination of different camera settings, but the same rules apply to any technique. The night sky is dark, so you want to optimise what little light there is for a well exposed picture. Manual mode will give you full control over aperture, shutter speed and ISO so I’d recommend using this mode all the time.
My recommended settings are f/2.8, 20 secs and ISO1000. Why? Well, for these reasons...
The more light you can let in through the lens, the brighter your image will be. A lens with an aperture of f/2.8 or wider (i.e. f/2.8, f/1.8, f/1.4 etc) is ideal. So set the widest available aperture. On my Nikkor 24mm f/2.8 lens that’s f/2.8.

On the left a Nikkor 24mm f/2.8D opened to f/2.8, and right the same lens stopped down to f/22. Notice the smaller opening on the right, restricting light passing through the lens and onto the image sensor
The shutter speed determines how long the image sensor is exposed to light for. The longer the shutter is open, the brighter the resulting image. The longer the shutter speed, the more blurring you’ll capture on moving subjects, like the satellites. I’d recommend a shutter speed of between 10-20 secs for long streaks. This also indicates to the viewer that the satellites are moving, and not just ‘another star’. Below you can see the difference between a 10 second and 20 second exposure.
The ISO changes how much electric current is running across the image sensor, and changes its sensitivity to light. We need the sensor to be as sensitive as possible because the night sky is dark, but with higher ISO’s we see an increase in noise and decreased in clarity and contrast in the photographs. As a trade off I’d recommend setting between ISO640 and ISO1000.

A 1:1 crop of the full-frame photograph at ISO1000. Notice much ISO noise? Me neither. If the exposure length is sufficient you shouldn’t find a problem with shooting high ISO. Taken on a Nikon D750 with a Nikkor 24mm f/2.8D at f/2.8, 20 secs, ISO1000
Technique
Put your camera on the tripod, aim it in the direction of where the satellites will travel over, and dial in the settings above. Keep the horizon close to the bottom of the frame to maximise the amount of sky you’ll be capturing.
To focus, engage Live View and zoom in to the brightest star you can find. Turn your lens (or camera body) to manual focus and turn the focus ring on your lens until the star is as small and sharp as possible, then zoom back out and leave the focus alone. Most of the time you’ll find a planet might be the brightest spot in the sky, usually Jupiter, Venus or Mars.

On the rear LCD screen, zoom in to the brightest spot in the sky and adjust manual focus until it’s small and sharp. Pictured is Jupiter rising from the East - planets are likely to be your brightest spot, either that or the moon if it’s visible
If you have a bungee cord, put your camera bag under the tripod and attach it using the cord. Most tripods have a specific hook for this very technique, to weigh down the tripod and prevent wobble during windy conditions. If you don’t have one, don’t worry.

Most tripods have a hook for tying weights onto. I like to bring a bungee cord tied to my camera bag so I don’t have to carry any extra when shooting in the field. Also, the elasticity allows some degree of repositioning without the need to move everything
Pop on your viewfinder cap, if your lens has it - or simply slide the in-built viewfinder cover over. Cameras with electronic viewfinders (EVF) won’t need this. It’s to stop extraneous light from coming through the viewfinder and spoiling the exposure. A bit of tape always works in a pinch.
Plug in your remote shutter release (whether it’s wired or wireless) and test to see that it works. Don’t have one? No problem, just engage the self-timer or exposure delay mode. This step minimises vibrations that you’ll impart when touching the camera to take the photo, which could otherwise lead to a blurry, wobbly picture as we’re using a long exposure. If you don’t have any of those, then you can always just press the button gently and you’ll probably get away with it.

An external remote release allows you to take a picture without touching the camera itself and causing camera blur from the vibrations. Pictured is the Hahnel Captur wireless remote release
Take a few test shots before the satellites are due to arrive and look on the rear screen to check the exposure. Gauging your exposure by looking at the rear screen is a little difficult, because each screen differs in brightness and colour range. The best thing to do is check your histogram to see where the graph falls.

Notice the histogram stacked to the left-hand side of the graph. It’s still bright enough to reach into the first quarter of the graph though
The histogram should be steeped towards the left (because it’s a dark, night sky) but should have some data creeping up towards the middle. If it looks too dark and the histogram is biased towards the left too harshly, and you can’t adjust your aperture or shutter speed any further (30 secs is also fine) then boost your ISO. Sure, you’ll get more noise, but you can reduce some of this when editing so don’t worry too much.

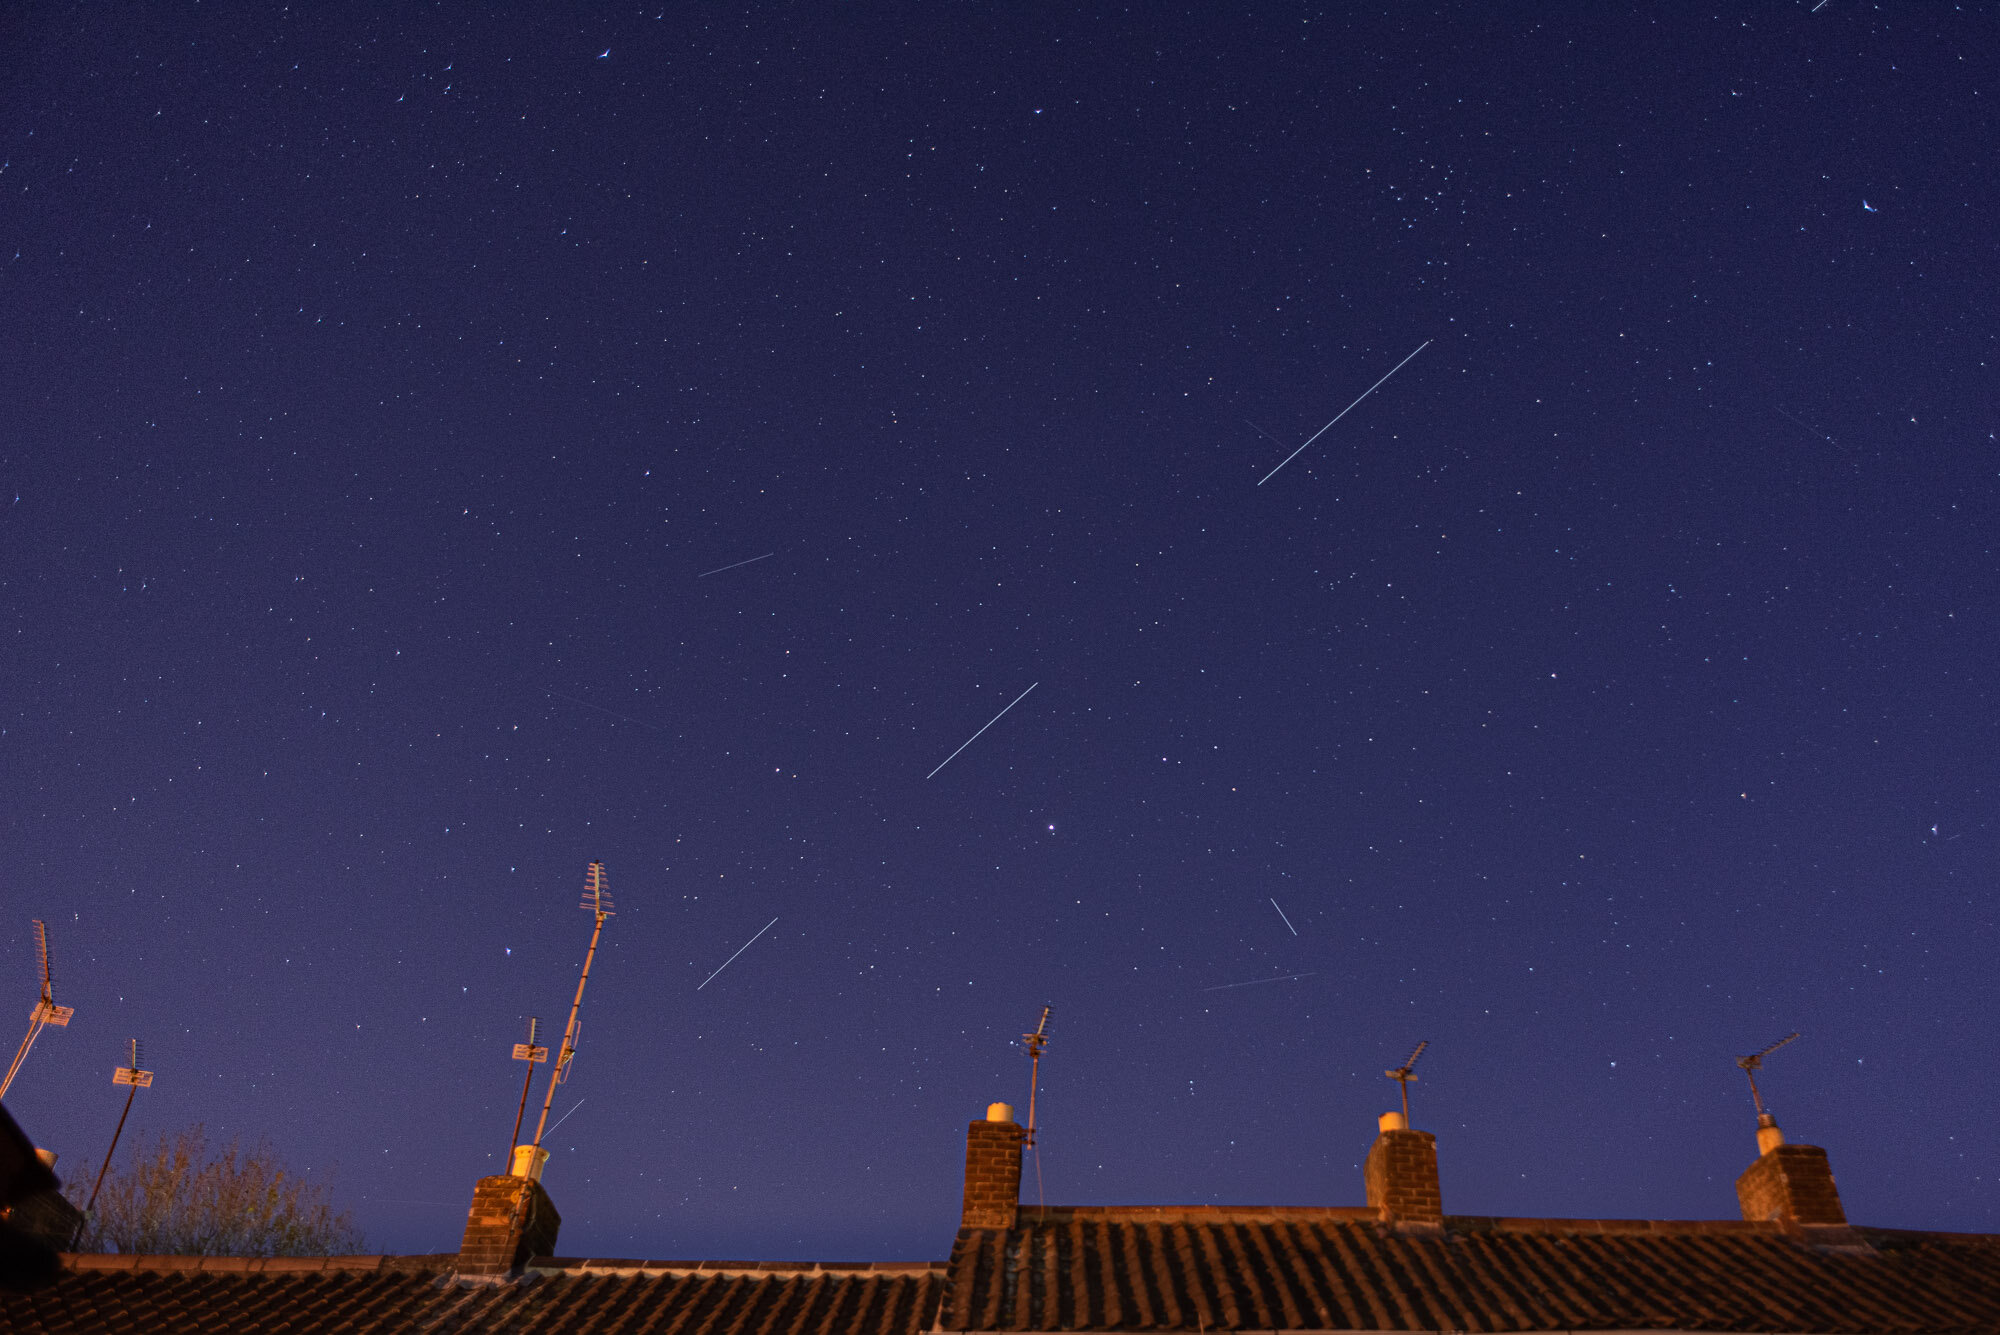
Six Starlink satellites can be seen here ‘setting’ in the North East having risen from the South West. They don’t always sit in perfect alignment behind one another, as you can see in the top right of the frame
Now you should be ready to capture the satellites as they fly over. At the moment there are 422 Starlink satellites in orbit, with seemingly around 20 or so visible from here in the UK, (at time of writing) but in the future SpaceX is planning on increasing this number to 12,000 so we should be in for a real show, unless they adjust and dull them right back.
So there we go, a comprehensive guide to photographing the Starlink satellites at night, and the great thing is, this technique will work well for most astrophotography and/or capturing the International Space Station as well. For more tutorials on how to photograph the night sky, whether it’s lightning, the aurora borealis (northern lights) or capturing the milky way, check out my other guides here.