Here’s a macro setup that you can do from home with minimal equipment and hopefully inspire you to take more macros and push further with photography. I want this to be as cheap and accessible for everyone, so I’ll describe my favourite setup for the best macro photographs.
Camera setup
Turn your lens around and hold it onto the lens mount on the body so it’s the wrong way round. It basically becomes a macro lens at this point. The wider your lens, the greater the macro, so a 24mm lens will magnify your tiny subjects greater than a 50mm which will make them appear smaller in the frame. Tip: Bored of holding your lens onto the camera body and having it slip around everywhere? Get a reversing ring. They’re usually about £5-£10 ($7-$15) and are a MASSIVE help - definitely your first purchase if you want to try macro. (put in link for nikon, canon, sony and fuji). On my reversed 24mm lens I get about a 3:1 magnification ratio which means however much space the subject takes up in real life, it takes up three times that space on the image sensor. True macro lenses have a 1:1 ratio or higher, so 3:1 definitely falls into the macro category.

A Zebra Jumping spider - the commonest jumping spider in the UK. Jumping spiders are the most common family of spiders, and found all over the world, so a good subject to find and shoot. Taken on a Nikon D750, with a reversed Nikkor 24mm f/2.8 lens at f/16, 1/100 sec and ISO800
My alternative setup, for when I want less magnification is to use my Nikkor 50mm f/1.4G lens (the normal way round) with a Raynox DCR 250 close-up filter. This is a much simpler way to shoot, but you’re limited by the optical quality of the filter, and you can’t get very high magnifications. I usually switch between the two, depending on the size of the subject and how much kit I want to use/whether I’m happy just using natural light.

Honeybee on a Grape Hyacinth. Taken using only natural light, shading the bee and flower with myself and the camera, the background is bright because it’s still in full sun. Taken on a Nikon D750, with a Nikkor 50mm f/1.4G + Raynox DCR 250 close-up filter, at f/3.5, 1/640 sec, ISO640.
Lighting setup
It’s going to be dark through the viewfinder so you’ll need some extra light. I recommend using a flashgun/speedlight. That’s because they output a LOT of light in one go, and over a very short period (much faster than the speed of your shutter speed) so it freezes your subject and brightens it up at the same time. You can do this with your pop-up flash if you have one. Just bounce the light off a bright piece of white card or foam, and make sure your block the direct flash light with something to ensure the light is soft and diffuse.
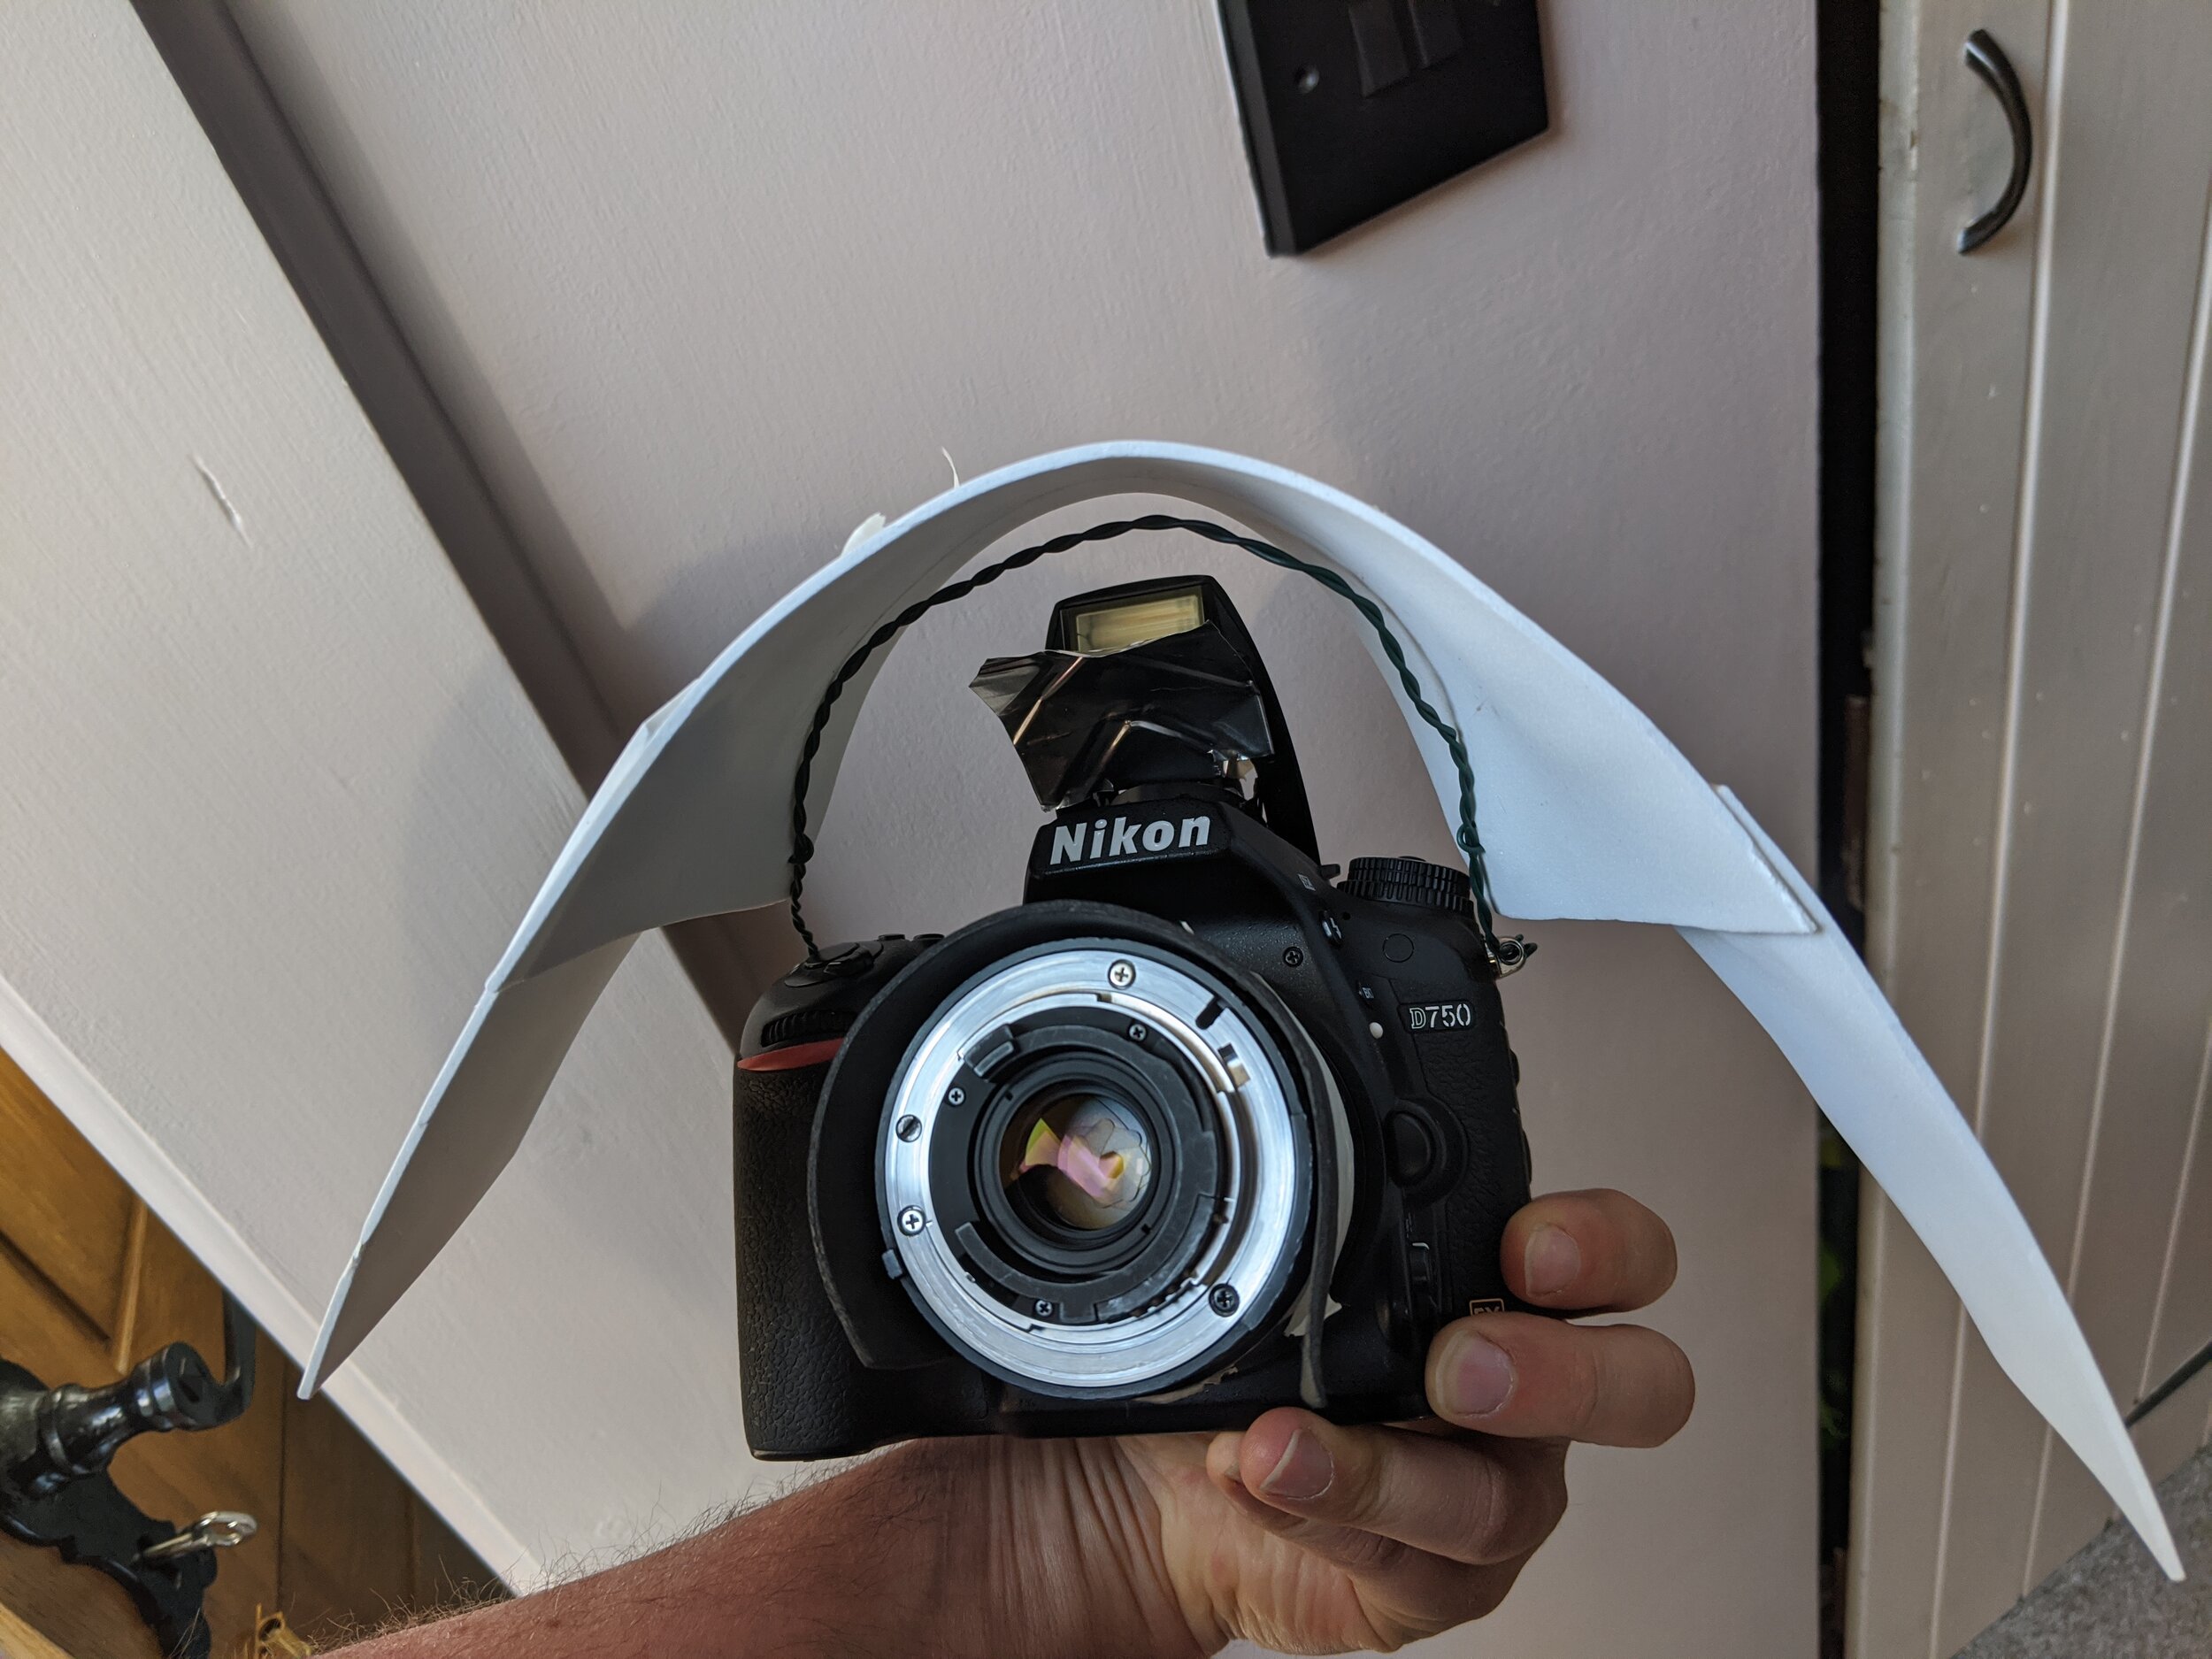
Using my pop-up flash, I put some white foam over the top, supported by some wound garden wire hooked through the strap attachments on my DSLR. Then a small piece of tin foil was placed under the flash to stop any direct light from creating harsh shadows on my subjects. The lens was also wrapped in black foam to protect the glass element from flare
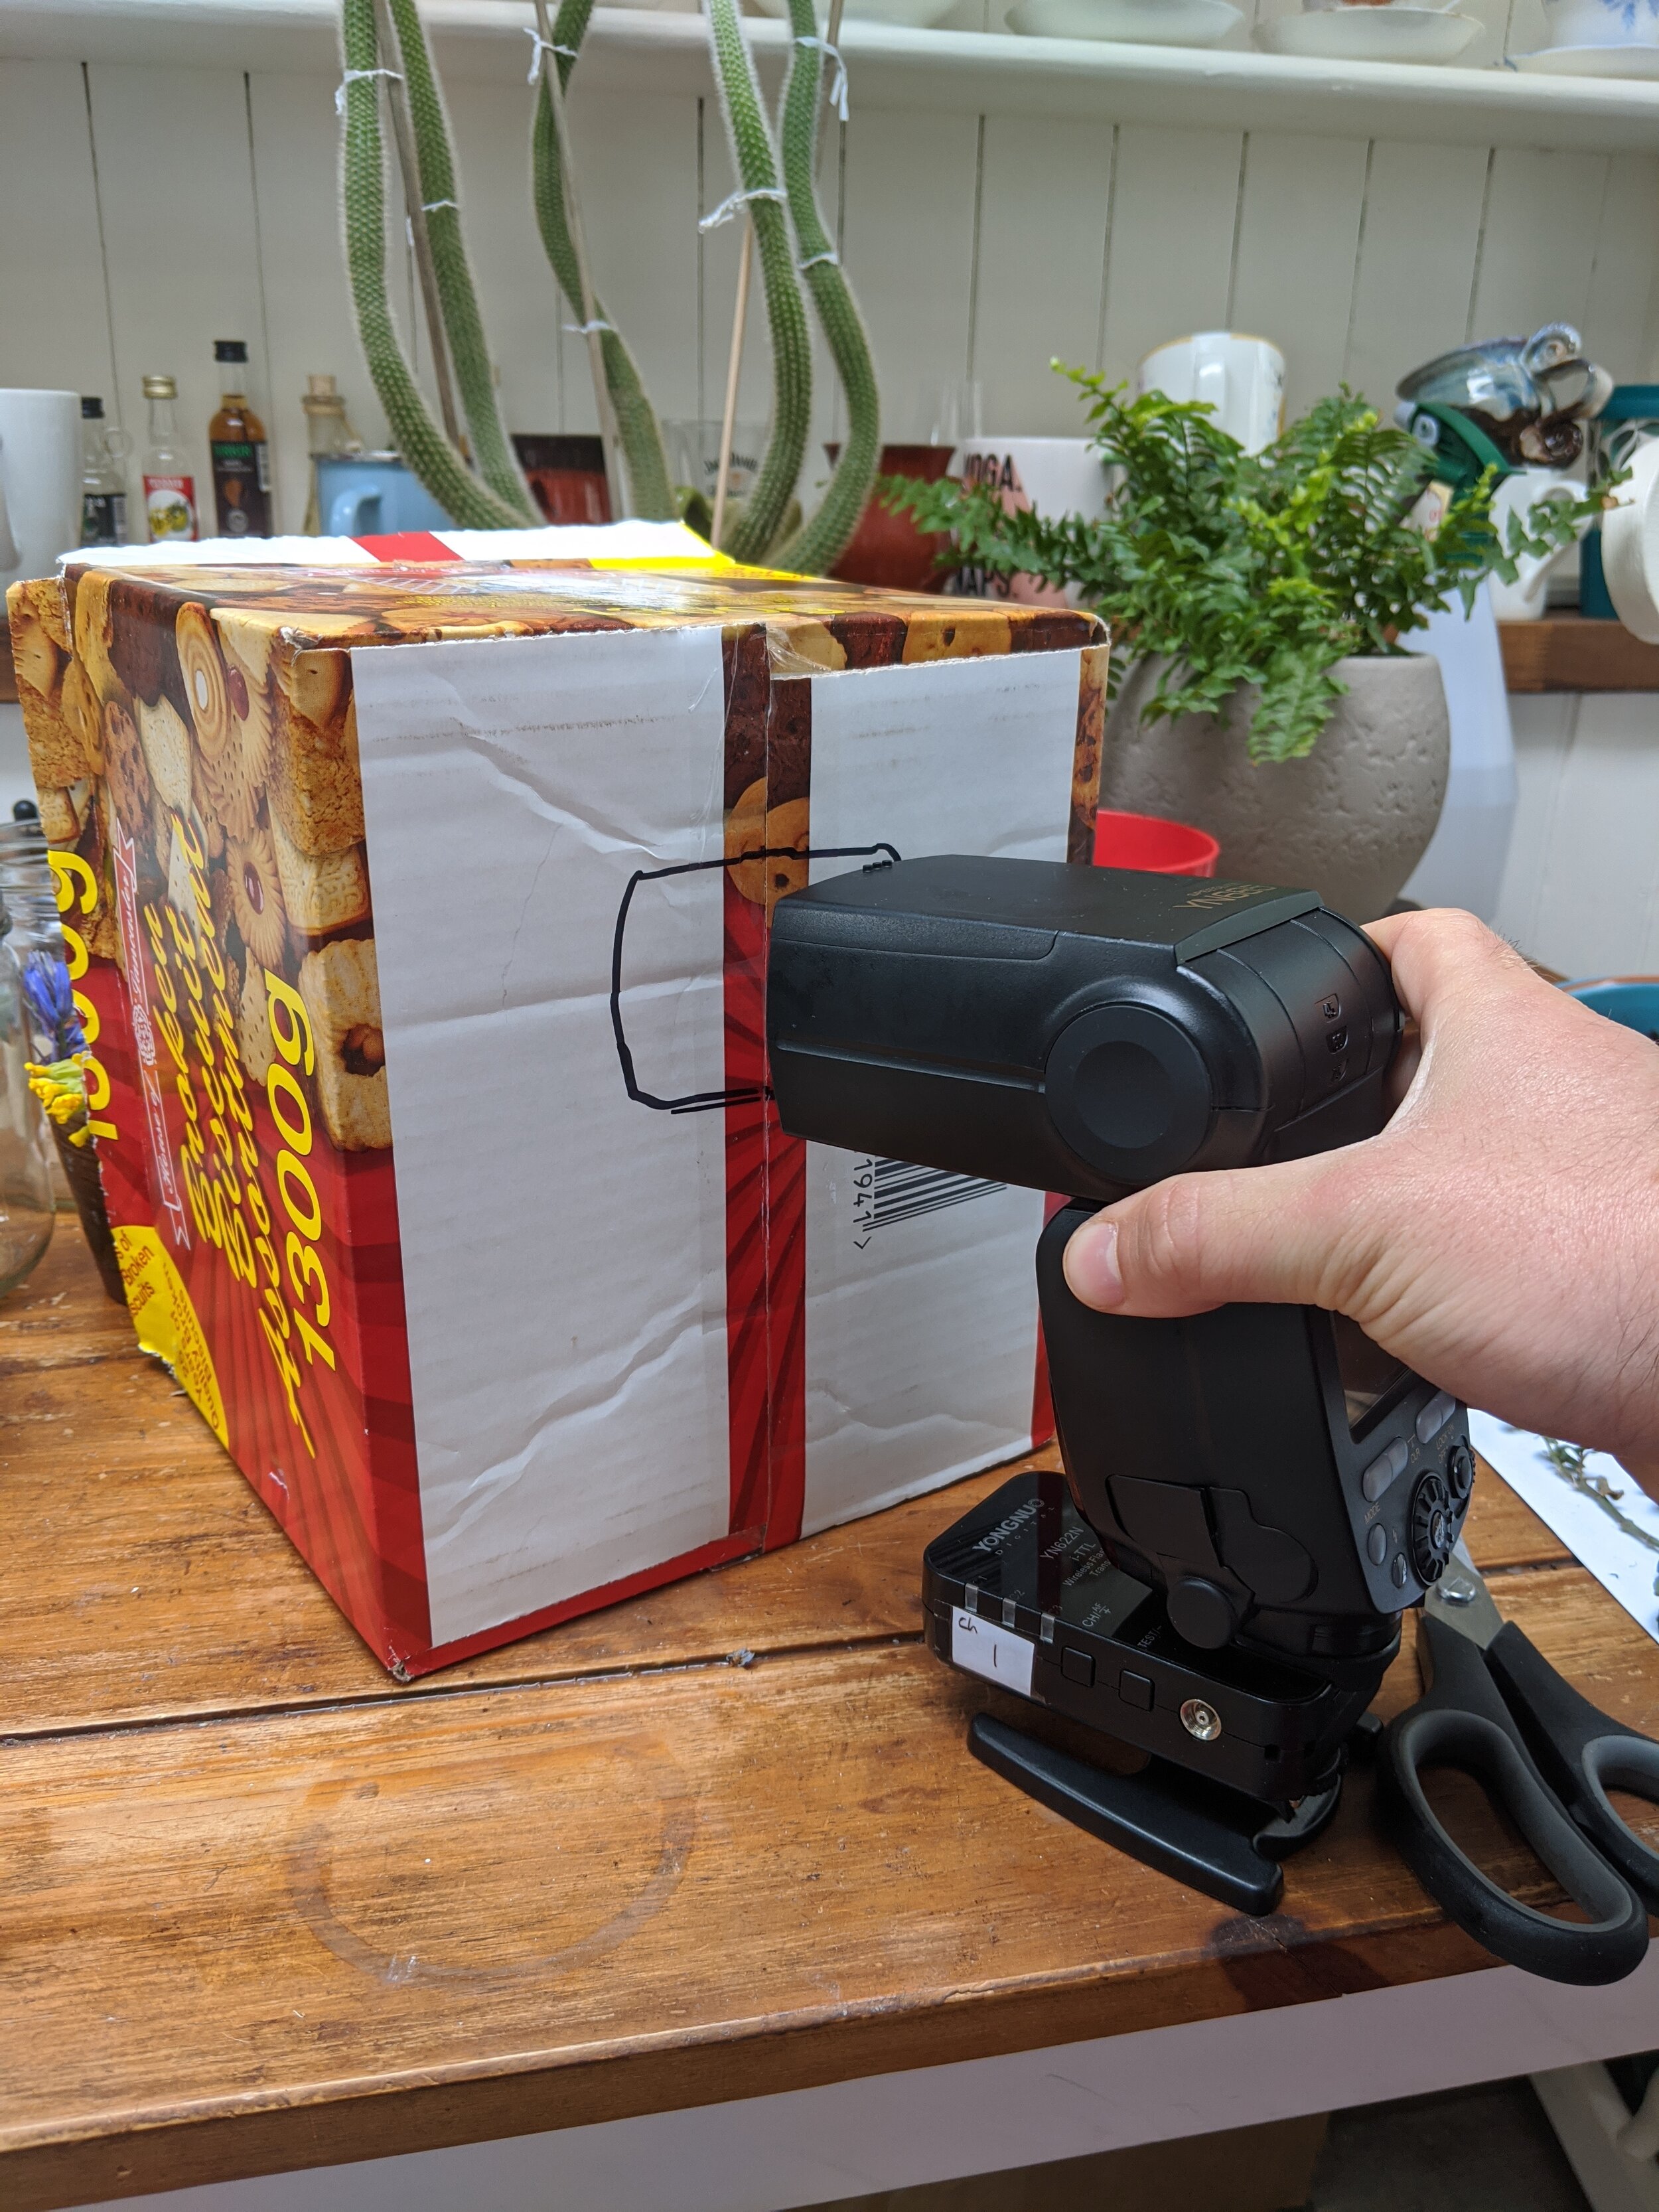
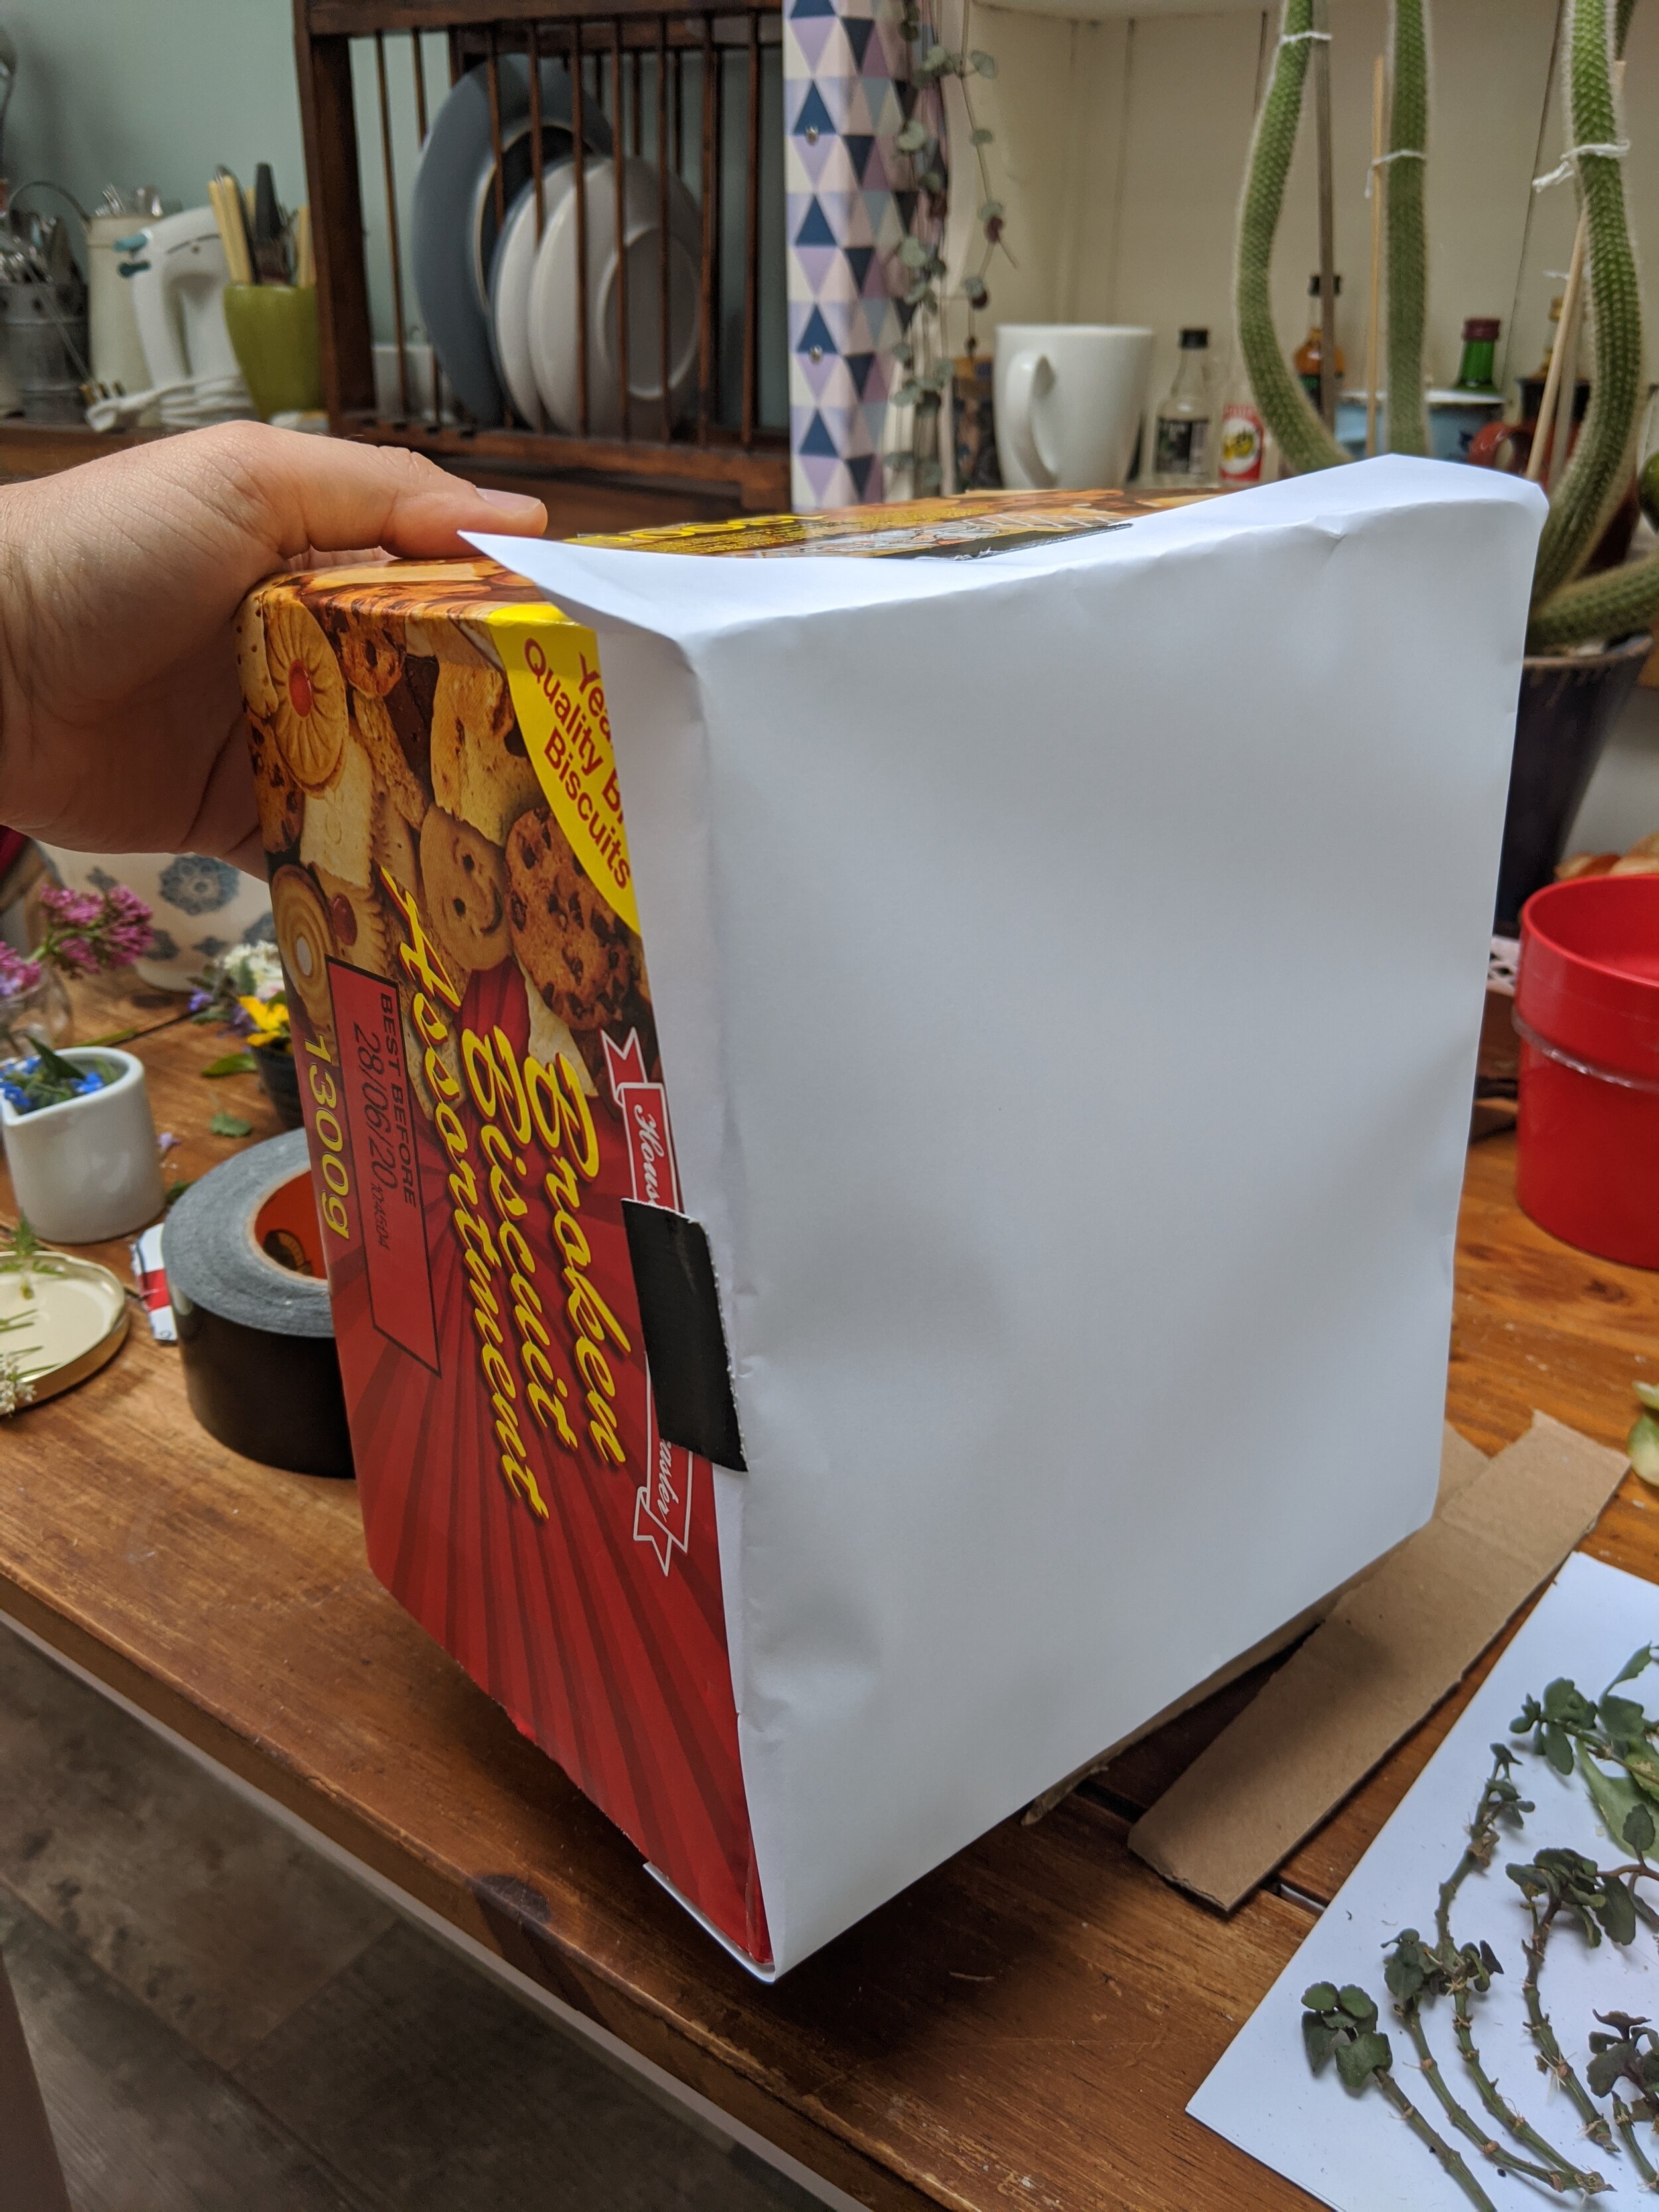
The bigger your light source, and the closer it is to your subject, the softer the shadows will be and it’ll look more flattering. So a quick way to make the light source bigger is to diffuse it through something, like a piece of paper. Or, if you’ve got some cardboard lying around just make a small box, and pop the paper on the front, cut a hole out the back for the flashgun and you have your own soft box.
Subject setup
The focal length of your lens will determine the amount of your subject you’ll get into the frame. For example, on a reversed 50mm lens you might be able to fit the head of a daisy fully in the frame, but whack on a reversed 24mm lens instead and you’ll be looking at a small portion of it. So it’s key to experiment with subject size by choosing a few different subjects and taking some test shots to see what looks the best with your overall setup. Take a look at the below images, both full frame, uncropped shots, taken with two different macro setups.

First I photographed this decomposed Beech leaf with a Nikkor 50mm f/1.4G lens and a Raynox DCR 250 close-up filter attachment. It looks clean and sharp, and I can fit in the whole leaf

The same Beech leaf photographed with a reversed Nikkor 24mm f/2.8 lens. Notice how much closer this setup takes us into the shot. Both shots work as macro photographs, but the magnification difference is clear
Settings
There’s no one way to take a good macro photograph, light placement, camera settings and composition all differ depending on what you’re shooting. However, some rough guidelines you could start at would be an aperture of f/11, shutter speed of 1/200 sec and ISO200. Let me explain why I’ve settled on these numbers.
Aperture - the higher the f-stop the longer your depth of field. So an aperture of f/11 will give a longer depth of field than f/5.6, that means more of the image is in focus from front to back. When working at super high magnification such as macro work, you’ll need as much depth of field as you can get. But don’t just whack it up to f/22 (if your lens goes that high) because there’ll be so much diffraction (light bending through the tiny hole in your lens) that it’ll get super soft and look unsharp. As a general rule of thumb don’t go above f/16 in macro work.
Shutter speed - I chose 1/200 sec because that’s the synchronisation speed of your shutter opening in relation to when the flashgun fires. Any faster (1/500 sec, 1/1000 sec etc) and only one part of the frame will be lit. Any slower (1/100 sec, 1/50 sec etc) and you’ll get motion blur in the areas not lit by flash. That said, if everything’s completely still and you want the ambient light to look a bit brighter, then slow that shutter speed right down, maybe even to 1/10 sec.
ISO - I chose ISO200 because you’ll want to get a bright, well-exposed image. Nothing too bright (overexposed) or too dark (underexposed). You might find that your flashgun doesn’t go bright enough to expose the scene correctly, and you may not want to adjust the aperture or shutter speed for the reasons detailed above. In which case, just stick your ISO up. Modern cameras can handle up to at least ISO1000 pretty well, but you do want to keep it as low as possible for better clarity in your shot.

This photograph of an African Daisy demonstrates a fine balance between shallow and long depth of field. The aperture was opened to f/2.2 and as such gives a shallow depth of field, but the slice of focus was placed just over the centre of the flower, giving enough detail to identify the plant, but throwing foreground and background into a creamy blur. Taken on a Nikon D750, Nikkor 50mm f/1.4G + Raynox DCR 250 close-up filter at f/2.2, 1/2500 sec, ISO400
Method
So, here’s my method. I’ve tested it time and time again over the past decade, so I know it works well, and consistently.
Get your light as close to the subject as possible. Preferably hanging just over the top of the lens, (or one from either side if using two flashguns) to make it look realistic, like the sun on a good day. Don’t let it flash the glass on your lens or you’ll get flare. In this case, just wrap a little card or black foam round the end of the lens and tape it down.
Use Live View with exposure simulation mode engaged on your camera. You’ll be able to see the subject easier than through the viewfinder (if using a DSLR). If you’re shooting mirrorless, I’d still say the rear screen is the way to go. It means you don’t have to crouch down into view - something that you’ll be doing a lot with small subjects in the field.
Edge slightly forward until the front of your subject is sharp, then rock forward and back until the slice of focus falls exactly where you want. Now take the shot. You’ll probably look at the image and realise you’ve missed the spot. No worries. Just do the same again, but this time take a few shots as you move incrementally forward towards the subject. That way, you’re likely to have part of the subject that’s in focus.
Repeat everything above and make tweaks as you go. Get in trouble? Refer to the troubleshooting steps down below, or drop me a comment at the bottom of this and I’ll do my best to come back to you with a solution.

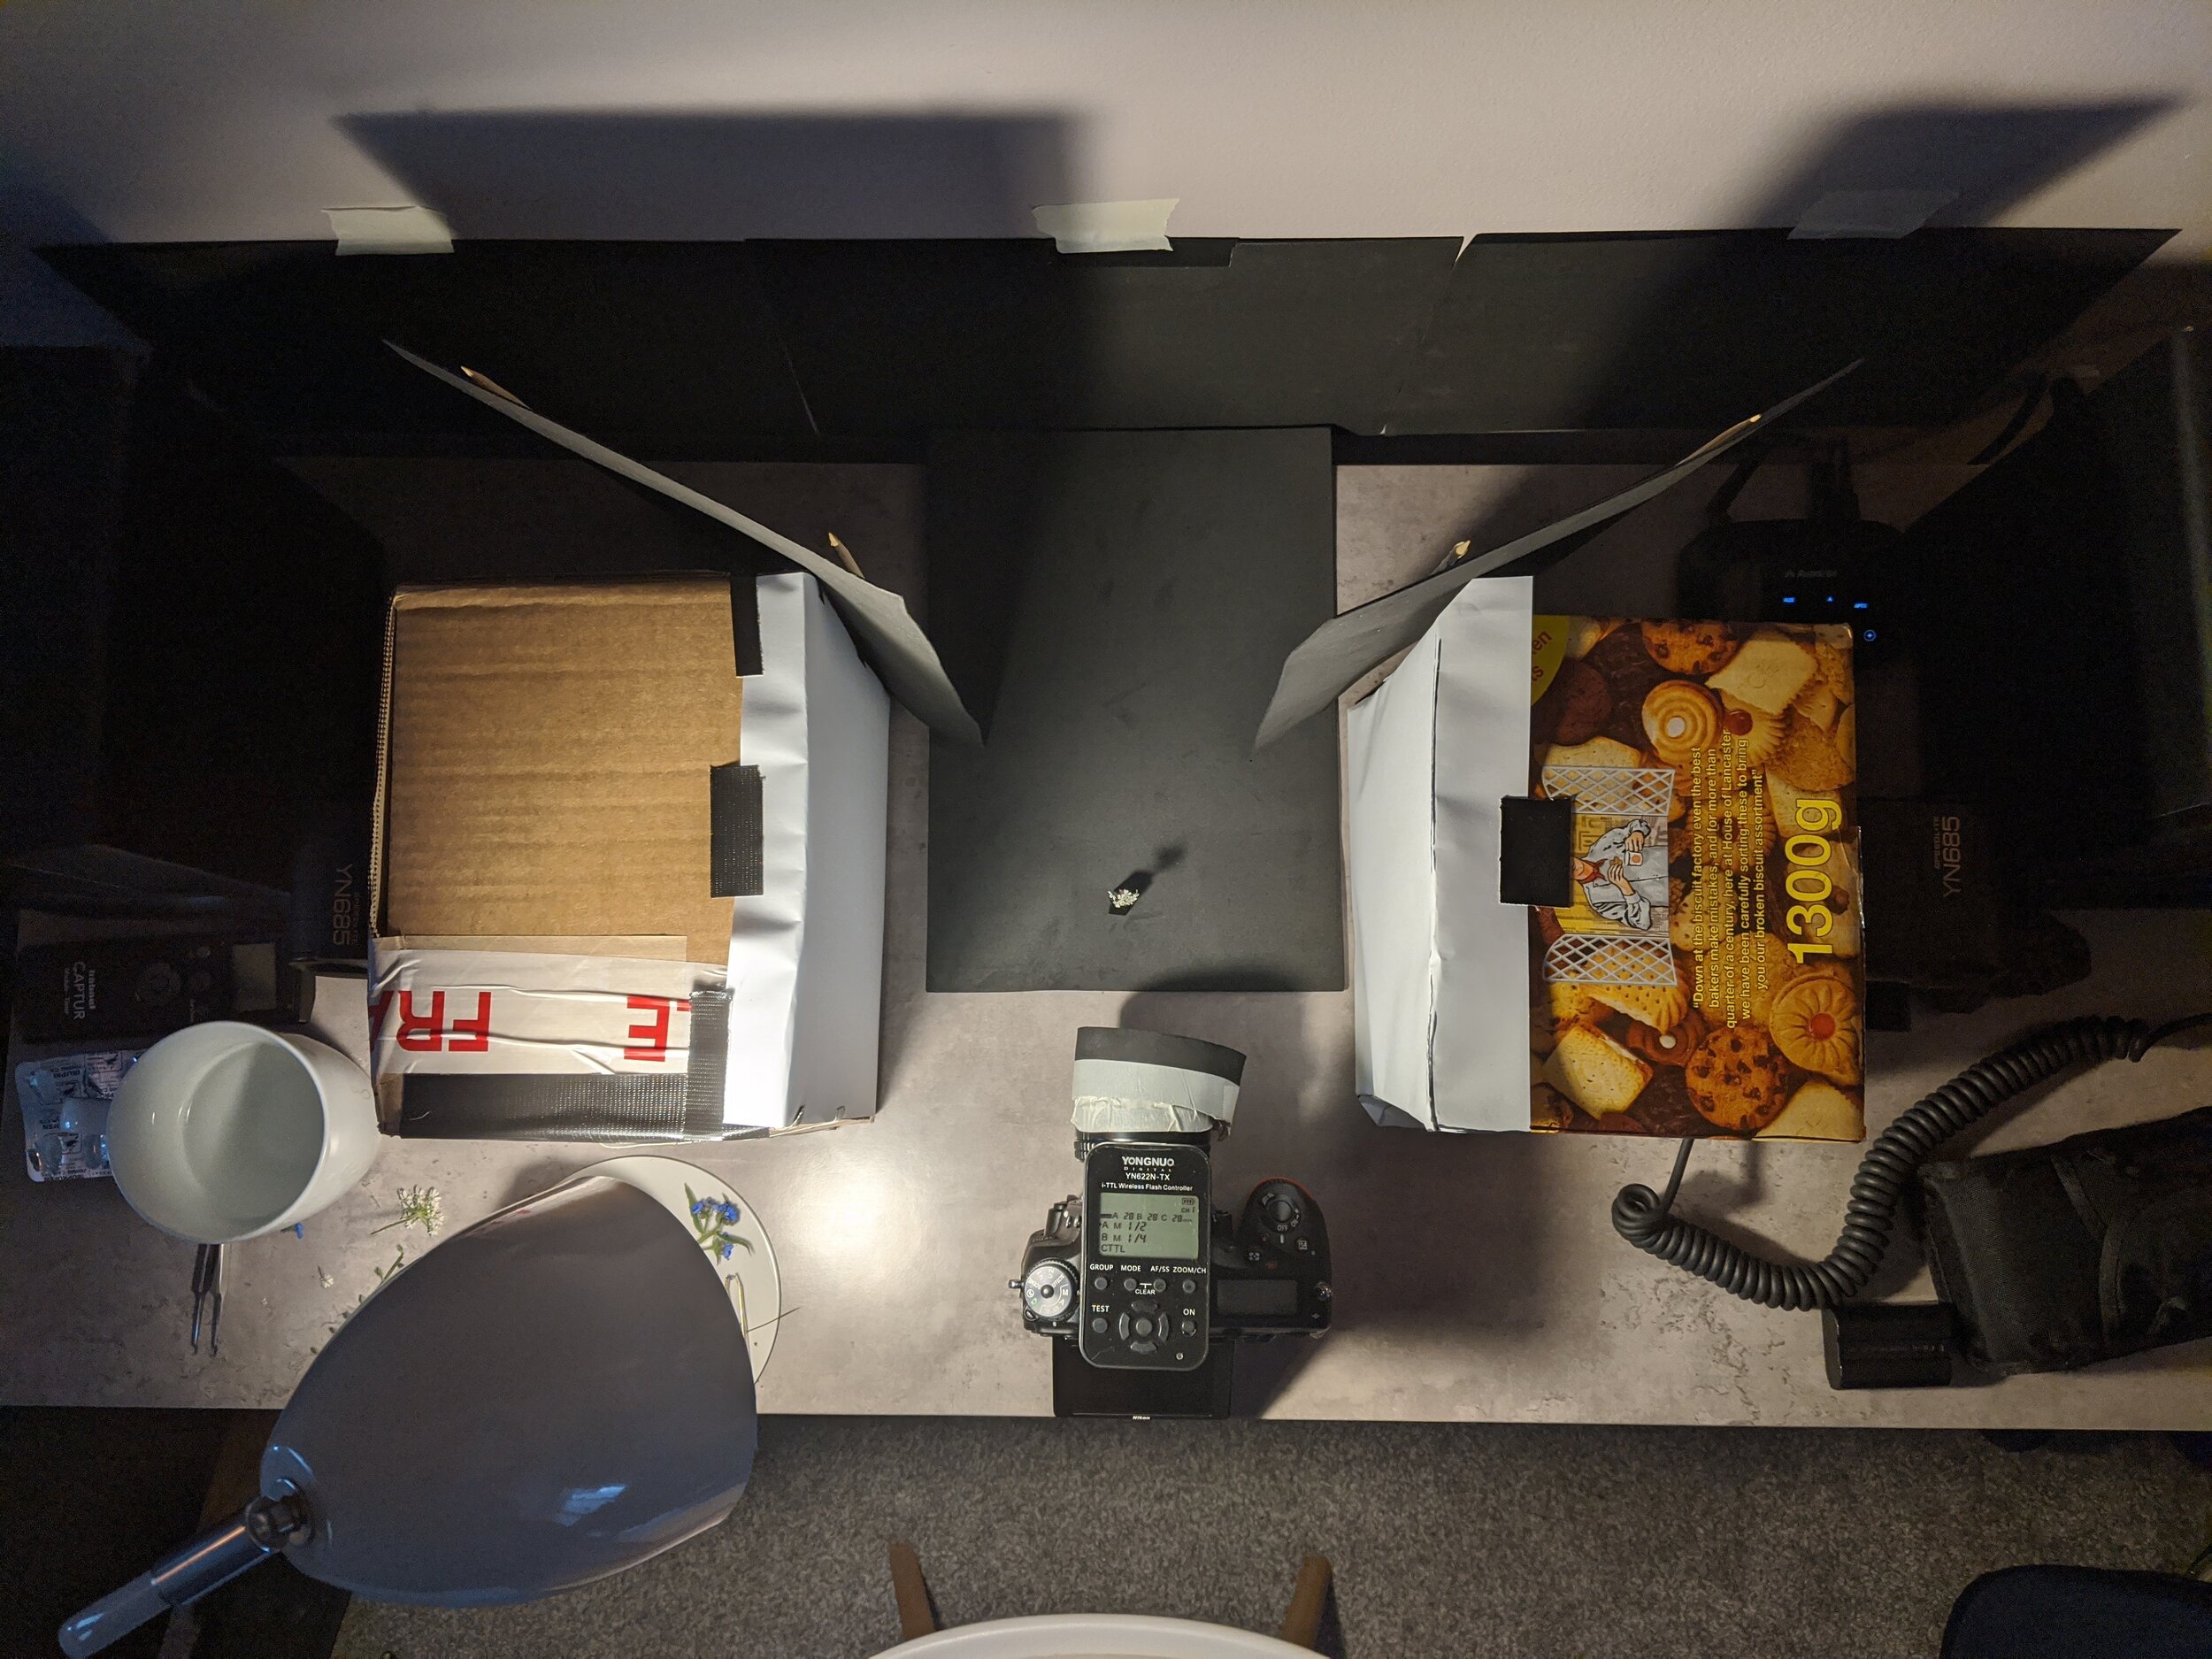
Here I’m shooting with my reversed lens setup to get that jumping spider shot at the top of the article. I’m using a flash bracket and a Yongnuo YN685 speedlight with an inflatable softbox attached to light the spider. The flashgun is triggered by a Yongnuo SC-28A hot shoe cable, but could also easily be triggered with a wireless remote. I rock back and forth and rattle off shots until one has the focus in the spot I want
Subject choice
There’s plenty of stuff to choose from when it comes to macro. The beauty of shooting impossibly small subjects is that the world becomes so much bigger. You only need to take one step outside the door to find a huge ecosystem and opportunities for photos. Even inside the house you can photograph houseplants, the nibs of ball-point pens, clothes, pet fur, your own hair - literally anything.
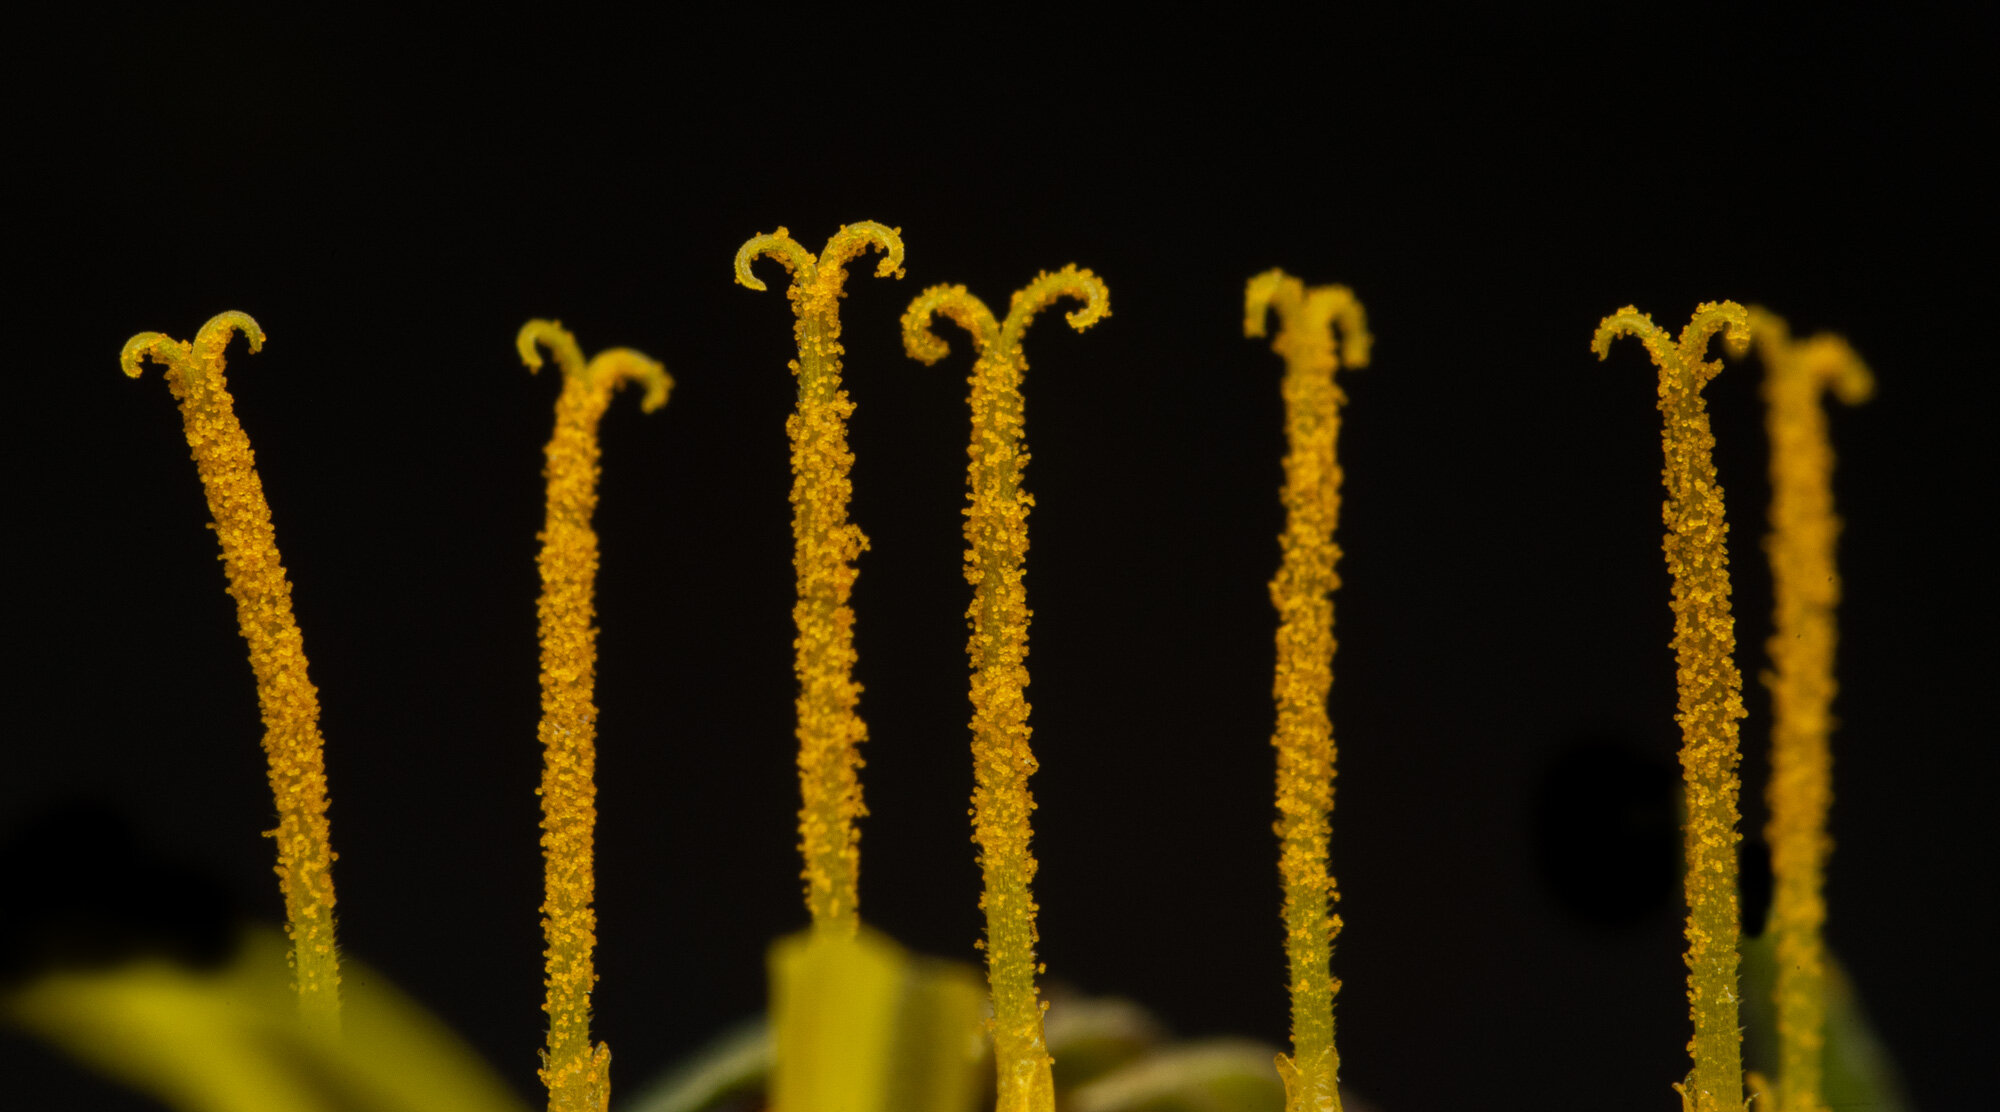
You’re likely to find incredible subjects in your own home or very nearby. This photograph is of a Dandelion stamen that was literally (yes literally) growing out of my doorstep. I got down low, and shot across the flower with my flash on. The flash was so much brighter than the ambient light outside, which meant my settings allowed the background (a fence) to fall into black. Taken on a Nikon D750, with a reversed Nikkor 24mm f/2.8 lens at f/16, 1/200 sec and ISO400
Stuck for ideas? Get a teaspoon and pour out one spoon of sugar, salt, and coffee grounds. Now take a macro shot of each subject using the same method and you’ll see a huge difference between the subjects and reveal something you can’t see with the naked eye.
So gather some subjects, or find them in the field, experiment with light, composition and focus and try my method out to capture some unique macro photographs. The best part? You don’t need to spend money on a macro lens, or expensive kit. Most of the time, you’ll be able to use what you’ve already got, and photograph subjects that are already around you. It’s so accessible, fun, and reveals a beautiful and massive world that we usually only skim past with the naked eye. It’s what got me into photography, and I hope it helps you, too.
Troubleshooting Guide
I can’t see anything - it’s too dark!
Try using a torch or a lamp to make your scene brighter. Or shoot in bright sunshine, it’ll be easier to see. If you’re on a Nikon there’s a little pin on the back of the lens (now the front of the lens) pull that and you’ll see everything gets brighter. That’s because you’re physically changing the aperture on the lens, so pull on it to open it up, then let go the minute you press the shutter release button to get your properly exposed shot. Canon lenses don’t have this, and I’m not sure if Sony, Fuji or Pentax do either, so I’d suggest engaging Live View and using the exposure simulation to brighten the scene, and/or make your rear screen as bright as possible when shooting.
My lens doesn’t have an aperture ring, how do I choose the aperture I want?
This differs between camera systems. This method usually works for most though: put the lens on the right way round, set the aperture you want in manual mode, then hold down the depth of field preview button and take off the lens. It’ll now lock into the right aperture.
I’ve got the subject in focus but it still looks soft and mushy, what’s wrong?
You’re probably shooting at either a wide aperture (f/2.8) or narrow aperture (f/22). A wide aperture will not provide enough depth of field to keep the entire subject in focus, and a narrow aperture will bring with it diffraction, which is the bending of the light through the lens, causing softness. Aim for between f/8 and f/11. If you’re still having problems, it may be that you have quite a soft lens. Try another lens and see if it makes a difference.
The colours look strange, how do I correct this?
I’d always shoot in RAW format, so you can change this after the fact. But if you want to choose JPEG that’s fine too. Just shoot in Flash mode - this will keep the colours accurate and consistent. There’s no extreme warming (yellow) or cooling (blue) in the photograph.
How do I process my shots to make them look better?
I’ll be coming on to this in my next macro article and showing you how to focus stack, add sharpness that doesn’t destroy the quality of the image, and enhance the natural beauty that’s already there.